

Tips and advice bicycle
There are advantages to having a bike with tubed tyres, but, while the basic process is the same, changing your tubed tyres—or the inner tubes—takes a little more care and attention to detail than tubeless. So, in this post, we're going to go over how to change a bike inner tube.
Cookie Privacy
To watch this video, you'll have to accept some cookies from YouTube. Just click on the button below to open the cookie module.
HOW TO MOUNT A ROAD TIRE ?
Cookie Privacy
To watch this video, you'll have to accept some cookies from YouTube. Just click on the button below to open the cookie module.
HOW TO MOUNT AND UNMOUNT A MOUNTAIN BIKE TIRE?
Tubeless and inner tube tyres: what's the difference?
A bicycle inner tube is an inflatable rubber ring that sits inside the tyre. When this tube is inflated, the tyre feels firm and can support the weight of the bike. So, to be clear: With a tube type tyre, you are not inflating the tyre itself, but the innertube inside the tyre.
Conversely, tubeless tyres have no inner tube. So, when you inflate them, you are pumping air directly into the space inside the tyre, which forms an airtight seal against the rim of the wheel. Tubeless wheels also need to have an airtight seal around the metal rim. This can be achieved with rim tape, though some rimless wheels have a solid rim bed. Tube type tyres do not need to have airtight rims as a rule (though some ship as "tubeless ready").
Both styles have their advantages and disadvantages, and though, traditionally, most bikes use tubed tyres, tubeless tyres are becoming increasingly popular among cyclists. So, let’s now look at how to change a bike inner tube.
How to change a bicycle inner tube
Firstly, it's important to distinguish between changing an existing inner tube and converting a tubeless tyre into a tubed tyre. The process of how to change a bicycle inner tube with tubeless tyres is just slightly different. So, we'll also point out those differences below.
What you’ll need to change your bicycle inner tube
Before you get started, you're going to need a few items, and it's best to have everything ready. So, make sure you have:
- A bike pump
- Tyre levers (at least two)
- Gloves
- Pliers
- Your replacement bicycle inner tube (and tyre if needed)
The gloves are, of course, optional, but advisable if you need to protect your hands. You will need to put some force into using your tyre levers and manipulating the tyre itself – and with no gloves, you could end up with sore hands.
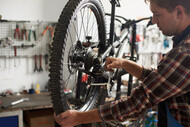
Removing the wheel
The process of removing the wheel from your bike is different for the front and rear wheels.
First, loosen the brakes. There are different types of brakes, of course, so you'll need to consult the instructions for your specific brakes. This applies to both front and rear wheels.
For the front wheel: Loosen the thru axle (or open the quick-release latch if your bike has one), and the wheel should then just slide out.
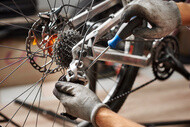
For the rear wheel: Make sure your chain is on the smallest cog on both the front and rear sprockets (small toothed gear wheels). Then loosen the central axle, as with the front, and slide the wheel out of the rear wheel’s bases, carefully lifting the chain off the rear cog as you do so.
For disc brakes MICHELIN recommends that you place a special tool between the brake pads when the wheel is removed. This prevents the pads from sticking when braking with the wheel removed.
Removing the tyre
Before you can remove the tyre, you will need to deflate it—assuming it is not already flat from the puncture. To do this, remove the dust cap from the valve and press down on the small pin in the centre to release the remaining air.
- First, unclip the beads from the rim take off the bead must always start at the valve.
- Push them down in the well of the rim.
- Pull out the 2nd bead by hand
Next, take a pair of tyre levers and work them under the rim of the tyre. If your tyre uses an inner tube (or you’re not sure), be careful not to lever too hard, otherwise you may nick or tear it. Once you have part of the tyre wall over the rim, start working your way around. When all of one side of the tyre is over the rim, you should be able to lever part of the other side wall over, and then simply pull it with your hands. Be careful not to trap your fingers. When the first tire bead is passed over the rim hook, do the same with the second one.
If you are only changing the tyre on a tubed bike and intend to re-use your existing inner tube, be careful when removing the tyre. It can be very easy to nip the inner tube with your tools, or against the rim, and cause damage.
Fitting the new bicycle inner tube and tyre
There is no special trick to putting everything back together—simply do what you did before, except in reverse. Take care not to trap the inner tube when getting the tyre back onto the rim, otherwise you could end up giving yourself a puncture before you've even taken the bike for a spin. Finished to pass a bead in the Rim at the valve. Make sure that the beads stay in the rim.
Refitting the wheel
Again, this process is the reverse of taking the wheel off. Your brakes should already be loose from taking the wheel off earlier. Just hold them out of the way when you push the wheel back into place. For the rear wheel, you'll need to work the chain back onto the sprocket gearing. This is often easier if you put the chain on a few teeth and then spin the wheel slowly.
For disc brake, take care when you refit your wheel, especially the rear wheel. Disc can damage your frame if you touch this one. Be sure to replace the disc correctly between the brake pads.
Finally, lock your wheel in place and reseat your brakes. Be sure to give the wheels a good spin with the bike stationary and off the ground. This will allow you to check each wheel spins true, look for any other issues, and give your brakes a test at the same time!
Now, of course, you’re good to go. But having mentioned both tube and tubeless tyres, let’s now take a closer look at some of the advantages and disadvantages of each.
Tube vs tubeless: advantages and disadvantages
- Tubeless tyres get fewer flats: Possibly the main reason why people switch to tubeless tyres is their superior resilience, which for the rider means less punctures. This is mainly because bicycle inner tubes are not particularly strong—they're not designed to be, that's the tyre's job. But if you strike something hard enough to compress the tyre so far inwards that the object reaches the rim, this can cause what is known as a pinch flat, or snake bite. This occurs when the bicycle inner tube is compressed enough to tear the tube itself.
- Tubeless gives you a better ride quality: Going tubeless allows you to run your tyres at a lower pressure, making for a smoother ride. Because you less need to worry about pinch flats, you can allow your tyres to absorb more of the force over rough terrain by having them a little softer.
- Tubed tyres are easier to inflate: An advantage of tubed tyres that shouldn't be overlooked—especially for cyclists who are going to be doing a lot of miles away from civilisation—is the fact that tubeless tyres are a little hard to inflate. You will need to move a lot of air quickly to get your tubeless tyres over the bead of the rim, so the tyre forms a proper seal. With tubed tyres, you are blowing up a sealed tube, so there is less urgency about the process.
- It's easy to go back to tubed from tubeless: If you switch to tubeless tyres and decide you don't like them, it's easy to go back to bicycle inner tubes. You can switch from tubed to tubeless in most cases, but it takes more effort. And, in some cases, switching to tubed means buying entirely new wheels. By the way, all our tires are tubeless ready, so they can be mounted with an innertube.
- Riding TLR don’t prevent you from buying a tube. In case of big puncture, you will have to mount your tire with a tube if sealant does not work worth.
Find the right tyre
Enter your Reg, vehicle or tyre size
We're searching for your tire...
Wait few seconds we're processing your photo